
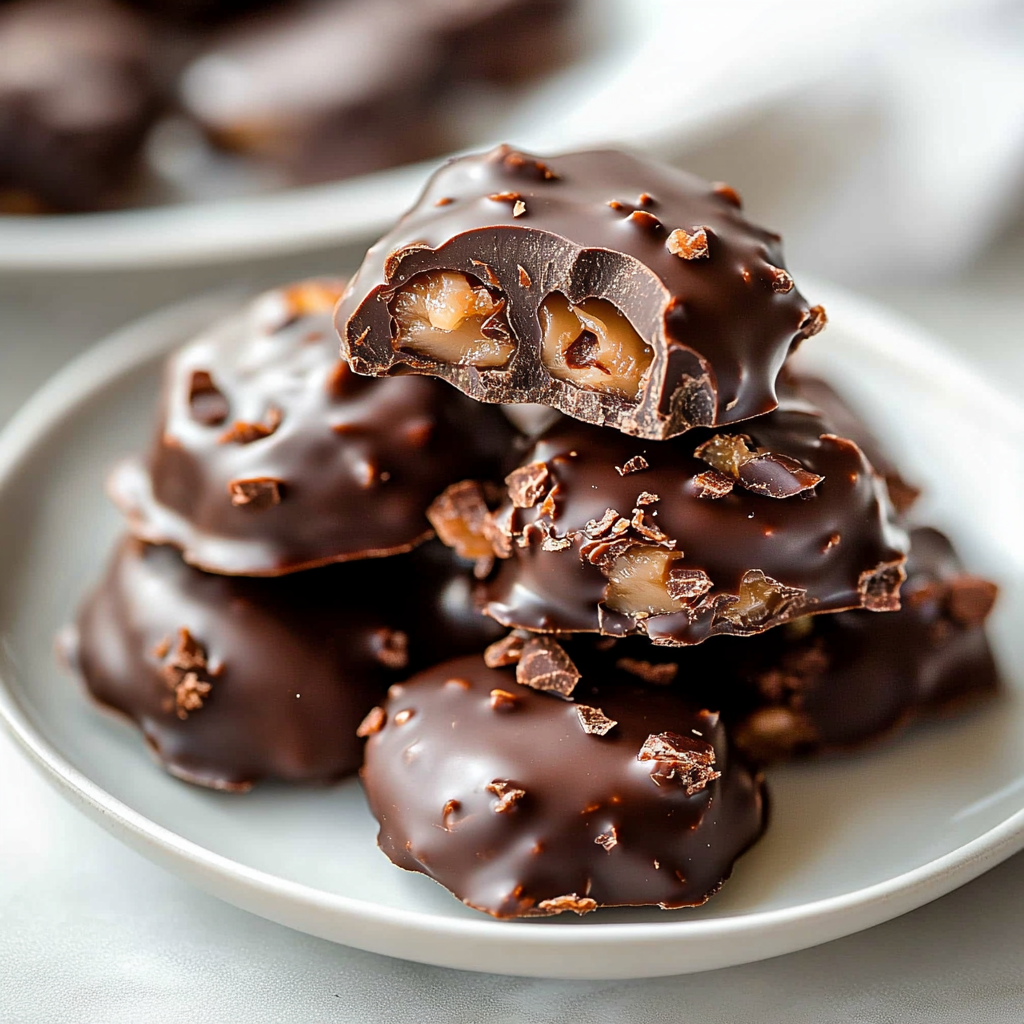
If you’re a fan of sweet treats that combine rich flavors and delightful textures, then you must try making easy homemade chocolate turtles. These irresistible confections are a perfect blend of crunchy nuts, chewy caramel, and smooth chocolate that will satisfy your sweet tooth. Making them at home can be surprisingly simple and incredibly rewarding. You can easily customize the ingredients to suit your taste preferences or dietary needs. Whether you’re preparing them for a special occasion or simply indulging in a personal treat, this recipe will guide you step by step through the process.
Chocolate turtles are a nostalgic favorite for many and evoke memories of family gatherings or holiday celebrations. With this recipe, you can recreate that joy in your own kitchen. The best part? You don’t need any fancy equipment or advanced skills to whip up these delicious bites. Just gather your ingredients, follow the instructions closely, and you’ll have an impressive homemade dessert ready to share with friends and family.
In this article, we will cover the essential ingredients needed for these delightful treats as well as detailed step-by-step instructions on how to prepare easy homemade chocolate turtles. Additionally, we will provide serving suggestions and storage tips so that you can enjoy these sweet delights at their best!
Main Ingredients
Nuts (Pecans or Walnuts)
The star ingredient of our easy homemade chocolate turtles is nuts—pecans or walnuts work wonderfully. You will need about 1 cup of either type of nut for this recipe. The nuts add a satisfying crunch and earthy flavor that perfectly complements the sweetness of the caramel and chocolate. When using pecans, opt for halves so they sit nicely under the caramel layer. If using walnuts, chop them roughly into pieces to create varied textures throughout each turtle.
Caramel
Next up is the caramel! You’ll need about 14 ounces of soft caramels for this recipe (usually around one bag). The caramel provides that gooey sweetness that makes chocolate turtles so irresistible. To save time, you can use store-bought caramels; however, if you’re feeling adventurous, making your own caramel sauce from scratch can elevate the flavor profile even further! Just ensure it’s soft enough to melt easily when heated.
Chocolate
For coating our decadent treats, you’ll require 8 ounces of high-quality dark or semi-sweet chocolate chips. The rich taste of dark chocolate balances out the sweetness of the caramel beautifully while adding an alluring sheen to the finished product. You could also use milk chocolate if that’s more to your liking! Melting the chocolate properly is essential; it should be smooth and glossy when ready for dipping.
Sea Salt (Optional)
While optional, sprinkling a touch of flaky sea salt on top enhances the flavors significantly! A pinch of salt elevates sweetness by providing contrast and depth in taste. It adds an extra gourmet touch to your homemade delicacies without overpowering them.

How to Prepare Easy Homemade Chocolate Turtles
Step 1: Prepare Your Workspace
Before diving into making your easy homemade chocolate turtles, start by preparing your workspace effectively. Clear off countertops and gather all necessary ingredients: nuts, caramels, chocolates, and any optional toppings like sea salt. Line two baking sheets with parchment paper; this will prevent sticking once the turtles are formed. Ensure you have a double boiler set up or a microwave-safe bowl ready for melting chocolates later on.
It’s also important to choose a comfortable area where you can work efficiently without interruptions. Preparing everything in advance makes the process smoother as you’ll have all components within reach when needed.
Step 2: Melt Caramels
Begin by melting your caramels because they need time to cool slightly before being shaped into turtle forms later on. In either a double boiler over low heat or in short bursts in the microwave (30 seconds at a time), gradually heat 14 ounces of caramels until fully melted and smooth—stir frequently to avoid scorching on bottom surfaces!
Once melted completely remove from heat and let it cool slightly until it’s comfortable enough to handle but still pliable enough for shaping into rounds.
Step 3: Form Nut Clusters
Take about one tablespoon worth of nuts (pecan halves or walnut pieces) and place them onto each lined baking sheet creating small clusters—about four per serving size is ideal depending on how large you’d like each turtle! Next pour approximately one tablespoon of warm melted caramel over each cluster covering thoroughly without spilling over onto parchment paper edges.
This is where creativity comes into play; feel free to adjust quantities according to preference whether you’d like more nuts than caramel!
Step 4: Chill Until Firm
Pop both baking sheets into the refrigerator allowing clusters topped with warm melted caramels enough time—roughly 15-20 minutes—to firm up before moving forward with coating in melted chocolates later on! This step ensures everything holds together nicely while maintaining shape during dipping stage ahead.
While waiting patiently—this could be an excellent opportunity for cleaning up any mess made thus far ensuring workspace remains tidy throughout entire process!
Step 5: Melt Chocolate
Now let’s melt those delicious dark or semi-sweet chocolates! Using either method again—a double boiler setup works great here too—or microwave method set at low power intervals stirring frequently until completely smooth shiny consistency achieved—this typically takes around three minutes total.
Make sure not overheating as burnt chocolate gives off undesirable bitter notes ruining overall flavor profile—we want velvety richness instead!
Once fully melted remove from heat source carefully pouring it into large bowl allowing easier handling later when dipping cooled nut-caramel clusters prepared earlier!
Step 6: Dip Each Turtle
With all elements ready begin dipping each turtle individually! Grasping clusters by their edges gently submerge them one at a time into melted luscious chocolaty goodness allowing excess drips back down before placing back onto prepared parchment paper-lined baking sheets earlier used.
Repeat until every cluster has been delectably coated leaving them looking irresistibly luxurious showcasing layers upon layers stacked together harmoniously!
Step 7: Add Sea Salt & Cool
For those who love added savory notes sprinkle just a pinch of flaky sea salt atop freshly coated chocolates right after dipping! This enhances overall taste experience immensely while providing beautiful contrasting aesthetics—much like gourmet treats found only at specialty shops!
Let completed turtles cool completely at room temperature before transferring them back into refrigerator once settled allowing flavors meld together beautifully enhancing enjoyment levels even further!

Serving and Storing Tips
Serving Suggestions
When serving your easy homemade chocolate turtles consider arranging them elegantly on decorative plates for special occasions such as birthdays or holidays! You might also package them within clear gift bags tied with pretty ribbons making thoughtful gifts sure impress loved ones during festive seasons too!
Pair these delightful confections alongside fresh fruits like strawberries which would complement sweetness while offering refreshing palate cleansers between bites – truly indulgent experience awaits guests if presented thoughtfully!
Another fun idea involves setting up a DIY dessert bar featuring various toppings including sprinkles crushed cookies drizzles sauces allowing guests customize their creations adding element surprise delightfully unexpected twist evening gathering whilst enjoying scrumptious treats together creating lasting memories shared amongst friends family alike!
Storage Guidelines
To keep your easy homemade chocolate turtles fresh longer store leftovers within airtight containers preferably placed inside refrigerator where they can last up three weeks if sealed properly avoiding exposure air moisture contamination preventing spoilage over time too quickly!
If desired freeze these tasty morsels after cooling completely—in well-sealed freezer bags storing maximum six months ensuring flavorful bites enjoyed anytime cravings arise without worry expiration dates looming overhead stress-free enjoyment guaranteed whenever mood strikes indulging decadent desserts made right home kitchen hassle-free way!
Remember always bringing chilled items back room temperature before serving enhances richness flavors allows full appreciation exquisite taste experience undoubtedly unforgettable every single bite savored relishing satisfaction created through simple yet effective culinary adventure embarked upon crafting deliciousness found within each turtle confection crafted lovingly hands-on approach leading ultimate delight whole family loves sharing together forever cherished moments created special times spent around table enjoying creations delighted hearts minds alike embraced food love binds us all together universally no matter distance between us!
Craving something different? Browse other delicious ideas!
Mistakes to avoid
Overcooking the Caramel
One of the most common mistakes when making easy homemade chocolate turtles is overcooking the caramel. Caramel can go from perfectly golden to burnt in a matter of seconds, so it requires close attention. When cooking sugar, use a heavy-bottomed saucepan and keep the heat on medium-low. Stir continuously to ensure even cooking and prevent burning. The right consistency for caramel should be thick but pourable. If you overcook it, the caramel will harden too much once cooled, making it difficult to bite into your turtles. Remember that caramel will continue to cook slightly after you remove it from the heat, so aim for a light amber color before taking it off.
Skipping the Cooling Time
Another mistake is not allowing enough cooling time for your chocolate turtles. Once you’ve assembled your turtles with nuts and caramel, it’s essential to let them cool completely before adding chocolate. If you skip this step, the warm caramel can melt the chocolate, creating a messy mixture rather than a clean coating. To help with cooling, you can place your assembled turtles in the refrigerator for about 15-20 minutes before dipping them in chocolate. This will also help solidify the caramel and make it easier to work with when coating them in chocolate.
Using Low-Quality Chocolate
The quality of chocolate you choose can greatly affect the taste of your easy homemade chocolate turtles. Avoid using low-quality or generic-brand chocolates, as they often contain fillers that can alter the flavor and texture negatively. Instead, opt for high-quality chocolate bars or chips made from real cocoa butter. Dark or semi-sweet chocolate typically pairs well with the sweetness of caramel and nuts. For those who prefer milk chocolate, ensure it’s still a good quality brand for optimal results. A rich chocolate will enhance your turtles, making them truly delectable treats.

Add some variety to your meal plan with these!
Tips and tricks
Use Fresh Ingredients
To elevate your easy homemade chocolate turtles, always use fresh ingredients. Fresh nuts bring crunchiness and an intense flavor that complements the sweetness of caramel beautifully. If you’re using pecans or walnuts, try buying them whole and chopping them yourself; this ensures maximum freshness and flavor retention. Additionally, make sure that your butter is fresh and of good quality when preparing caramel; this helps achieve that rich taste that everyone loves in these delightful treats.
Experiment with Flavors
Don’t hesitate to experiment with flavors when making easy homemade chocolate turtles! While traditional recipes call for pecans, consider using almonds or cashews for a unique twist. You can also add a touch of sea salt on top after drizzling with chocolate for an exciting contrast between sweet and salty flavors. For those who love spice, try adding a hint of cinnamon or chili powder to your caramel mixture. These subtle adjustments can take your turtles to another level while still keeping them simple to prepare.
Store Properly
Proper storage is crucial for maintaining the quality of your easy homemade chocolate turtles. After they have cooled completely, store your turtles in an airtight container at room temperature if consumed within a week. If you plan on keeping them longer than that, consider refrigerating them to extend their shelf life; however, be cautious as refrigeration may alter their texture slightly due to moisture absorption from air exposure. To prevent sticking together, place parchment paper between layers if stacking.
Looking for something quick and easy? See more here!
Suggestions for Easy Homemade Chocolate Turtles
Choose Your Nuts Wisely
When making easy homemade chocolate turtles, carefully select your nuts based on personal preference and texture desired in each turtle. Traditional pecans are popular due to their buttery flavor and crunchy texture but feel free to explore other options like hazelnuts or macadamia nuts for something different yet equally delicious! Whichever nut you choose should complement both the sweet caramel layer and rich chocolate coating effectively while enhancing overall enjoyment.
Don’t Rush Assembly
Take your time assembling each turtle for optimal results when creating easy homemade chocolate turtles! Rushing through this process often leads to uneven layers of nuts and caramel or poorly shaped turtles that do not visually appeal as much as they could have been if given more care during assembly. Aim for generous amounts of both nuts and caramel while ensuring even distribution on each turtle base before drizzling with melted chocolate afterward; this creates aesthetically pleasing treats everyone will love!
Consider Dietary Needs
When preparing easy homemade chocolate turtles, always consider dietary needs among friends or family members who may indulge in these sweet delights! For individuals with nut allergies or lactose intolerance issues within their groups—consider alternative ingredients such as coconut flakes instead of nuts within recipes while substituting dairy-free chocolates accordingly—this ensures inclusivity while maintaining delicious flavors without compromising on taste!

Need more tasty meals? Check out our recipe collection!
Roasted Brussels Sprouts and Cinnamon Butternut Squash with Pecans
FAQs for Easy Homemade Chocolate Turtles :
What are Easy Homemade Chocolate Turtles made of?
Easy Homemade Chocolate Turtles consist of three main ingredients: pecans, caramel, and chocolate. First, you toast the pecans to enhance their flavor and crunchiness. Then, you make or purchase soft caramel and shape it into small rounds that you place on top of the pecans. Finally, melting chocolate is poured over the caramel to create a delightful coating. This simple combination results in a treat that is rich in taste and texture, making them an ideal dessert for any occasion. You can easily customize your turtles by using different nuts or types of chocolate, such as dark or milk chocolate. The beauty of this recipe lies in its versatility; feel free to experiment with flavors and toppings!
How do I store Easy Homemade Chocolate Turtles?
To properly store Easy Homemade Chocolate Turtles, place them in an airtight container at room temperature. If your kitchen tends to be warm, consider refrigerating them to maintain their firmness. However, avoid exposing them to moisture as it may affect their texture and taste. If stored correctly, these delightful treats can last up to two weeks. For extended storage, you can freeze them for up to three months. Just ensure they are separated by parchment paper to prevent sticking together. When ready to eat, let them thaw at room temperature for the best flavor experience.
Can I use other nuts for my Easy Homemade Chocolate Turtles?
Yes! While pecans are the traditional choice for Easy Homemade Chocolate Turtles, you can definitely use other nuts based on your preference. Almonds, cashews, or walnuts work beautifully as substitutes and will provide different flavors and textures to your chocolate turtles. Simply follow the same steps in the recipe; just replace the pecans with your nut of choice. Experimenting with various nuts not only adds diversity but also allows you to tailor this treat according to dietary preferences or allergies.
How long does it take to make Easy Homemade Chocolate Turtles?
Making Easy Homemade Chocolate Turtles typically takes around 30 minutes from start to finish. The preparation involves about 15 minutes for assembling the components—heating the caramel and melting the chocolate—and another 15 minutes for cooling and setting time. However, if you’re making larger batches or allowing extra time for chilling in the refrigerator, be sure to factor that into your total time estimate. Overall, this quick process makes homemade chocolate turtles an easy and rewarding treat.
Can children help make Easy Homemade Chocolate Turtles?
Absolutely! Making Easy Homemade Chocolate Turtles can be a fun family activity that children can participate in. They can assist with tasks like arranging pecans on a baking sheet or drizzling melted chocolate over the caramel-filled clusters. However, adult supervision is essential when handling hot caramel or melted chocolate to ensure safety during preparation. This enjoyable cooking experience not only creates delicious treats but also fosters valuable cooking skills in children.
What variations can I try with Easy Homemade Chocolate Turtles?
The possibilities are endless when it comes to variations of Easy Homemade Chocolate Turtles! You can add sea salt on top of the melted chocolate for a sweet-salty combination that enhances flavor depth. Additionally, consider incorporating flavored chocolates like mint or orange zest into your melty coating for a unique twist! For a healthier version, use dark chocolate instead of milk chocolate and opt for unsweetened coconut flakes as a topping instead of extra sugar-laden ingredients.
Try this next for another flavor-packed experience!
Conclusion for Easy Homemade Chocolate Turtles :
In summary, Easy Homemade Chocolate Turtles are a delightful treat that combines crunchy pecans with sweet caramel and rich chocolate. With just a few simple ingredients and minimal time investment, anyone can whip up these mouthwatering candies at home. Remember that experimentation is key; feel free to substitute different nuts or flavors based on personal preferences while following our guidelines for storage and preparation.
These tasty morsels not only make fantastic gifts but also a perfect addition to any dessert table during celebrations or gatherings with family and friends. Whether indulging yourself or sharing with loved ones, these homemade treats promise satisfaction in every bite! So gather your ingredients today and enjoy creating this easy yet delicious recipe that will surely impress everyone around you!
Print
Easy Homemade Chocolate Turtles Recipe
- Total Time: 30 minutes
- Yield: 12 servings 1x
Description
Easy Homemade Chocolate Turtles are a delightful treat that beautifully melds crunchy nuts, gooey caramel, and smooth chocolate into one irresistible confection. Perfect for any occasion, these sweets evoke nostalgia and can be customized to suit your taste. Whether for a holiday gathering or a personal indulgence, this simple recipe makes it easy to create gourmet-style treats right in your kitchen.
Ingredients
1 cup nuts (pecans or walnuts)
14 ounces soft caramels
8 ounces high-quality dark or semi-sweet chocolate chips
Sea salt (optional)
Instructions
Prepare your workspace: Clear the counter and line two baking sheets with parchment paper.
Melt the caramels using a double boiler or microwave until smooth. Let cool slightly.
Form nut clusters by placing about one tablespoon of nuts on the baking sheets and topping each with melted caramel.
Chill in the refrigerator for 15-20 minutes to firm up.
Melt the chocolate until smooth, then dip each chilled turtle in chocolate and place back on parchment.
Sprinkle with sea salt if desired, then let cool completely at room temperature.
Notes
Experiment with different nuts like almonds or cashews for unique flavors.
For added flair, consider infusing flavors into the caramel, such as vanilla or sea salt.
- Prep Time: 15 minutes
- Cook Time: 15 minutes
Nutrition
- Calories: 150
- Fat: 8g
- Carbohydrates: 18g
- Protein: 2g