
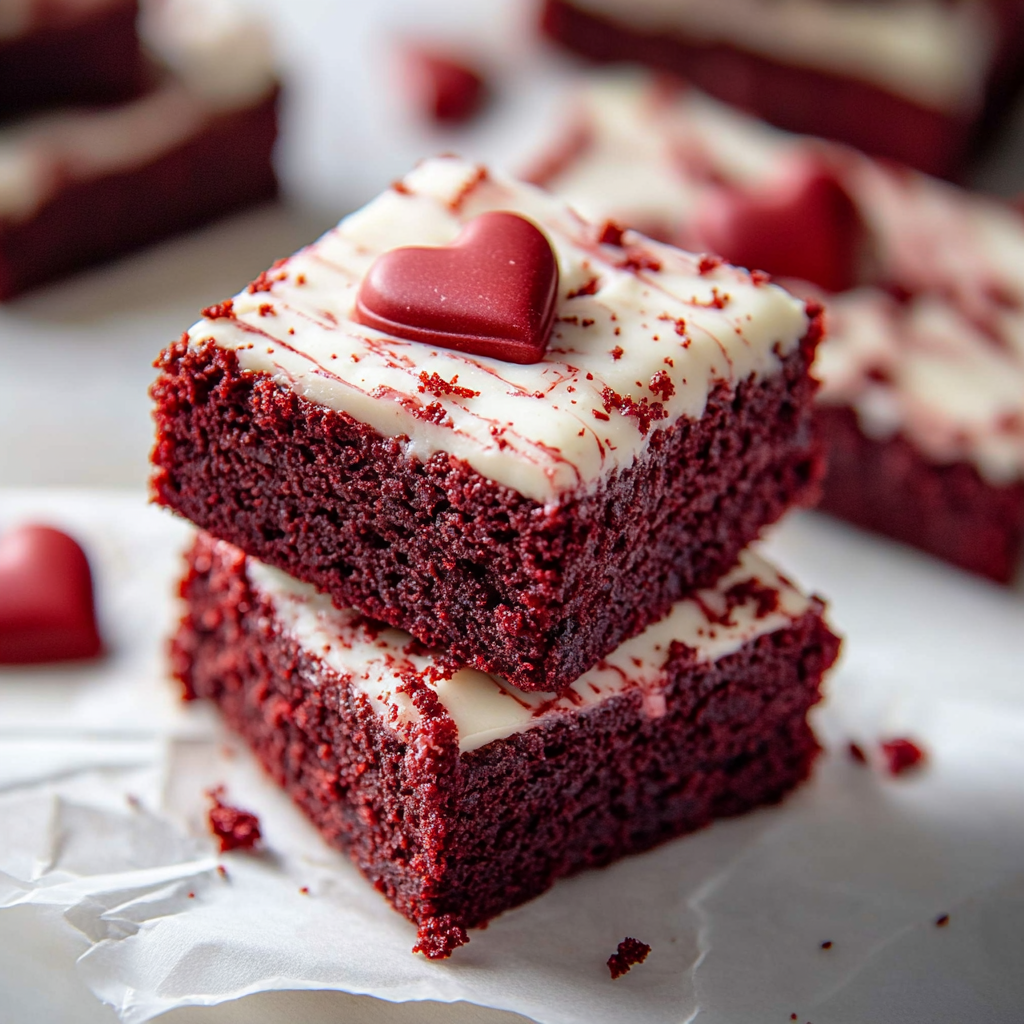
Valentine’s Day is a time to celebrate love, affection, and sweet indulgences. What better way to express your feelings than with a batch of decadent Valentine’s Day Red Velvet Brownies? These delightful treats combine the classic flavors of red velvet cake with the rich texture of fudgy brownies. The result is a dessert that is not only visually stunning but also incredibly satisfying for anyone with a sweet tooth.
These brownies are perfect for sharing with your significant other, friends, or family. Their vibrant color makes them a standout choice for any romantic occasion or gathering. Plus, they are easy to whip up in just a few simple steps! With their luscious cream cheese frosting and subtle cocoa flavor, these brownies will have everyone asking for seconds.
In this article, we will guide you through the essential ingredients you need to create these irresistible treats and provide you with step-by-step instructions on how to prepare them. You’ll also learn some serving and storing tips to ensure that your Valentine’s Day Red Velvet Brownies remain fresh and delicious. So grab your mixing bowl and let’s get started on this delightful baking adventure!
Main Ingredients
All-Purpose Flour
All-purpose flour serves as the foundation of our Valentine’s Day Red Velvet Brownies. For this recipe, you will need 1 cup (120 grams) of all-purpose flour. This ingredient gives structure to the brownies while providing the right balance of fluffiness and density. When measuring flour, it’s essential to spoon it into the measuring cup and level it off for accuracy. This ensures that your brownies achieve the perfect texture.
Cocoa Powder
Cocoa powder adds depth of flavor to the brownies while contributing to their beautiful color. You’ll need 1/3 cup (40 grams) of unsweetened cocoa powder for this recipe. Opting for high-quality cocoa powder will enhance the chocolatey taste without overpowering the distinct flavor of red velvet. Make sure to sift it before use to avoid any lumps that could affect the smoothness of your batter.
Sugar
Sugar is crucial for sweetness and helps achieve that fudgy brownie texture we all love. In this recipe, you will require 1 cup (200 grams) of granulated sugar. The sugar not only sweetens but also creates moisture within the brownies as they bake. It’s essential not to skip or reduce this ingredient since it plays a significant role in balancing flavors.
Eggs
Eggs contribute moisture and act as binders in these Valentine’s Day Red Velvet Brownies. You’ll use 2 large eggs in this recipe. They provide richness and help achieve that perfectly chewy texture we crave in brownies. Be sure to bring them to room temperature before adding them to your batter for optimal results.
Vegetable Oil
For an ultra-fudgy consistency, vegetable oil is preferred over butter in this brownie recipe. You will need 1/2 cup (120 ml) of vegetable oil. Oil keeps the brownies moist and tender while also helping them rise during baking. It’s important not to substitute oil with solid fats like butter or margarine as they can change the texture significantly.
Buttermilk
Buttermilk not only adds moisture but also gives a slight tang that complements the cocoa flavor beautifully. Use 1/4 cup (60 ml) of buttermilk in this recipe; if you don’t have buttermilk on hand, you can easily make a substitute by mixing one tablespoon of vinegar or lemon juice with one cup of milk and letting it sit for five minutes.
Vanilla Extract
Vanilla extract enhances all the flavors in our brownies while adding a lovely aroma. You’ll want 1 teaspoon (5 ml) of pure vanilla extract for this recipe—don’t skimp on quality here! Pure vanilla extract makes a noticeable difference compared to imitation vanilla.
Red Food Coloring
To achieve that signature red hue associated with red velvet desserts, you’ll need about 2 tablespoons (30 ml) of liquid red food coloring in our brownie mix. This ingredient is essential for both visual appeal and keeping with tradition; however, ensure you use high-quality food coloring for consistent results.
Cream Cheese Frosting
No red velvet treat is complete without cream cheese frosting! For our topping, we recommend using about 1 cup (240 grams) of cream cheese at room temperature mixed with powdered sugar until smooth—this adds richness and provides a delightful contrast against our fudgy brownies.

How to Prepare Valentine’s Day Red Velvet Brownies
Step 1: Preheat Your Oven
Begin by preheating your oven to 350°F (175°C). Preheating is crucial as it ensures an even baking environment from start to finish so that your Valentine’s Day Red Velvet Brownies achieve that perfect rise without becoming dense or undercooked.
While waiting for your oven to reach the desired temperature, take out an 8×8-inch baking pan and line it with parchment paper or grease it lightly with cooking spray—this step prevents sticking once they’re baked.
Step 2: Mix Dry Ingredients
In a medium-sized bowl, whisk together the all-purpose flour, unsweetened cocoa powder, baking powder (if using), baking soda (if using), and salt until combined evenly; set aside temporarily.
This step helps distribute leavening agents uniformly throughout your dry mixture which contributes towards achieving optimal rise during baking—you want those brownies fluffy yet fudgy!
Step 3: Combine Wet Ingredients
In another large mixing bowl, combine granulated sugar with vegetable oil—mix thoroughly until well-blended using either an electric mixer or whisk by hand until slightly frothy—this should take about two minutes max!
Next up comes adding room-temperature eggs one at a time followed by vanilla extract alongside buttermilk plus finally incorporating liquid red food coloring gradually until everything becomes one seamless mixture—make sure there aren’t any visible lumps left behind!
Step 4: Combine Wet & Dry Mixtures
Now it’s time! Slowly add your dry ingredients into wet mixtures while gently folding everything together using a spatula or wooden spoon until no streaks remain visible; avoid over-mixing since doing so could lead towards toughening up those delectable textures we’re aiming for here!
Once combined fully without lumps remaining visible—it’s time transfer this luscious batter into prepared baking pan spreading evenly across edges ensuring thickness remains uniform throughout surface area!
Step 5: Bake & Cool
Slide your brownie-filled pan into preheated oven place them on middle rack ensuring enough space surrounding pan allowing heat circulation evenly surrounding edges—bake at aforementioned temperature between twenty-five-twenty-eight minutes depending upon preferences regarding fudginess versus cakeyness when testing doneness stick toothpick inserted center comes out clean yet moist crumbs adhere slightly indicating readiness!
Once baked perfectly remove from oven allow cooling within pan set atop wire rack approximately fifteen minutes prior removing parchment paper lifting gently out letting cool completely before proceeding onto frosting stage ahead next!
Step 6: Prepare Cream Cheese Frosting
While waiting patiently upon cooling process let’s whip up some dreamy cream cheese frosting—start by beating softened cream cheese alongside powdered sugar until velvety smooth consistency achieved avoid lumps appearing throughout add splash milk if necessary adjust thickness desired based personal preference!
Once achieved desired creamy spreadable state grab cooled brownie base ready apply generous layer frosted delight atop surface spreading evenly across ensuring each bite contains mouthwatering combination flavors enjoyed previously experienced alongside treat itself!

Serving and Storing Tips
Serving Suggestions
When serving your exquisite Valentine’s Day Red Velvet Brownies consider slicing them into bite-sized squares making them easy-to-eat finger foods perfect for gatherings! To elevate presentation further dust additional powdered sugar atop frosted surface or drizzle melted white chocolate creating stunning effect contrasted against vibrant color below!
Pair these delightful bites alongside scoop vanilla ice cream offering contrasting temperatures enhancing overall experience even more enjoyable whilst bringing warmth within celebrations shared amongst loved ones too! Consider presenting alongside fresh strawberries adding extra romance factor appealing visually whilst tantalizing taste buds simultaneously highlighting special occasion celebrated together as well!
Storage Guidelines
To store leftover Valentine’s Day Red Velvet Brownies properly allowing maximum freshness ensure they cool completely place within airtight container either at room temperature or refrigerate depending upon personal preferences! If stored correctly they last approximately four-five days maintaining optimal taste quality remaining intact throughout duration enjoyed later down line too enjoy whenever cravings arise unexpectedly!
For longer storage options consider freezing brownies individually wrapped tightly using plastic wrap followed by placing inside freezer-safe bags allowing preservation extending months beyond usual lifespan keeping those delicious memories alive far beyond initial dates celebrated together amongst friends families alike indulging again upon return visits made later down road ahead whenever desired most especially after special occasions arise once more!
Love this dish? You’ll enjoy these too!
Decadent Baileys Red Velvet Brownies with Cheesecake Swirl Recipe
Mistakes to avoid :
Not Using Fresh Ingredients
Using fresh ingredients is crucial for the best flavor in your Valentine’s Day Red Velvet Brownies. If you opt for old or expired ingredients, your brownies will lack the rich taste and texture that makes them special. Flour, cocoa powder, and baking soda can lose their potency over time, leading to flat and unappealing brownies. Always check expiration dates and choose high-quality products for optimal results. Additionally, using old eggs can affect the rise of your brownies. Make sure your eggs are fresh, as they contribute to the moisture and structure of the dessert.
Skipping the Baking Time
Overbaking or underbaking can ruin your Valentine’s Day Red Velvet Brownies. Each oven is unique; therefore, it’s essential to keep a close eye on your brownies as they bake. The ideal baking time usually ranges from 20 to 30 minutes. To check for doneness, insert a toothpick into the center; it should come out with a few moist crumbs but not wet batter. If you overbake them, you’ll end up with dry brownies that lack the gooey texture everyone loves. Conversely, underbaked brownies may not set properly and could be too fudgy.
Ignoring Temperature
Temperature plays a significant role in baking success. When making Valentine’s Day Red Velvet Brownies, be sure that all ingredients are at room temperature before mixing. Cold butter or eggs can lead to uneven mixing and ultimately impact the texture of your brownies. Allow butter to sit out for about 30 minutes before using it, ensuring it’s soft enough to cream properly with sugar. Similarly, warm ingredients help create a smoother batter, leading to a more uniform bake.

Expand your recipe collection with this!
Tips and tricks :
Use Quality Cocoa Powder
To achieve rich chocolate flavor in your Valentine’s Day Red Velvet Brownies, invest in high-quality cocoa powder. Dutch-processed cocoa lends a deeper color and flavor compared to regular cocoa powder. The richness of the cocoa will enhance both the taste and visual appeal of your brownies. When selecting cocoa powder, look for brands that specify they’re suitable for baking and have no added sugars or fillers. This simple tip can elevate your brownie game significantly.
Experiment with Add-Ins
Adding unique ingredients can take your Valentine’s Day Red Velvet Brownies to another level. Consider incorporating chocolate chips, nuts, or even swirls of cream cheese frosting into the batter for extra flavor and texture. These additions not only enhance taste but also make each bite more exciting. If you prefer a deeper chocolate experience, try adding dark chocolate chunks instead of semi-sweet ones. Just remember not to overpower the original brownie flavor; balance is key.
Don’t Rush Cooling Time
Cooling time is just as important as baking time when making Valentine’s Day Red Velvet Brownies. While it may be tempting to dig in right away, allowing your brownies to cool completely will enhance their texture and flavor. Warm brownies can be too gooey and difficult to cut neatly; letting them cool allows them to firm up for easier slicing into perfect squares. Once cooled, cut them into squares while still in the pan; this prevents them from breaking apart during transfer.
More culinary magic awaits you here!
Suggestions for valentine’s day Red Velvet Brownies :
Pairing with Ice Cream
For an indulgent treat on Valentine’s Day, consider pairing your Red Velvet Brownies with ice cream! A scoop of vanilla or cream cheese ice cream complements the rich chocolate flavors beautifully while adding a creamy texture contrast. You can also experiment with other flavors like raspberry or mint-chocolate chip for an exciting twist that enhances the overall dessert experience.
Preparing Ahead
If you’re planning a romantic dinner on Valentine’s Day, preparing these brownies ahead of time can ease stress on the big day. You can bake them one day prior and store them covered at room temperature or even refrigerate them for longer freshness. Just allow them to come back to room temperature before serving so they maintain their delightful texture.
Decorating Creatively
Presentation matters when it comes to impressing someone special on Valentine’s Day! Consider decorating your Red Velvet Brownies with heart-shaped sprinkles or drizzling melted white chocolate on top for an elegant touch. You could also place fresh raspberries or strawberries alongside each brownie when serving; these fruits add vibrant color and complement the flavors beautifully while enhancing visual appeal.

Unleash more flavor with these recipes!
FAQs for valentine’s day Red Velvet Brownies:
What ingredients do I need to make valentine’s day red velvet brownies?
To create delicious valentine’s day red velvet brownies, gather the following ingredients: 1 cup of unsalted butter, 1 cup of granulated sugar, 2 large eggs, and 1 teaspoon of vanilla extract. You’ll also need 1 cup of all-purpose flour, 1/4 cup of cocoa powder, 1 teaspoon of baking powder, and a pinch of salt. The star of the show is red food coloring; about 2 tablespoons will give your brownies that classic rich hue. For an extra touch, consider adding white chocolate chips or cream cheese frosting on top. This combination not only makes for a visually stunning dessert but also enhances the overall flavor profile. Feel free to adjust the sweetness with powdered sugar if you prefer a sweeter brownie.
How long does it take to bake valentine’s day red velvet brownies?
Baking valentine’s day red velvet brownies typically takes around 25-30 minutes at a preheated oven set to 350°F (175°C). It’s important to keep an eye on them as baking times may vary based on your oven type and the thickness of the batter in your pan. To check for doneness, insert a toothpick into the center of the brownies; it should come out with a few moist crumbs but not wet batter. After removing the brownies from the oven, allow them to cool in the pan for about 10-15 minutes before transferring them to a wire rack. This cooling period helps set their texture and makes it easier to cut into neat squares.
Can I prepare valentine’s day red velvet brownies ahead of time?
Absolutely! You can prepare valentine’s day red velvet brownies in advance. They store well in an airtight container at room temperature for up to three days or in the refrigerator for about a week. If you want to make them even earlier, consider freezing them after they have cooled completely. Wrap each brownie individually in plastic wrap and then place them in a freezer-safe bag or container. When you’re ready to enjoy them, simply thaw them at room temperature for a few hours or microwave them for about 10-15 seconds for a warm treat. This makes it convenient if you’re planning a romantic dinner or gathering.
What is the best way to serve valentine’s day red velvet brownies?
Serving valentine’s day red velvet brownies can be both fun and creative! Cut them into heart shapes using cookie cutters for an extra festive touch. You can also serve them warm with a scoop of vanilla ice cream on top for an indulgent dessert experience. Drizzling some cream cheese frosting over each brownie adds richness and complements the chocolatey flavor nicely. Garnish with fresh raspberries or strawberries for added color and freshness that ties in perfectly with Valentine’s Day themes.
How can I customize my valentine’s day red velvet brownies?
Customizing your valentine’s day red velvet brownies is simple! You might incorporate different mix-ins such as chopped nuts, mini chocolate chips, or even crushed candy canes for added flavor and texture. Swirling cream cheese batter into your brownie mixture before baking creates a delightful marbled effect that looks stunning when cut into squares. Additionally, consider dusting powdered sugar on top after they cool, or drizzling melted chocolate over your brownies for an eye-catching presentation.
Are there any gluten-free options for valentine’s day red velvet brownies?
Yes! Making gluten-free valentine’s day red velvet brownies is easy with some ingredient adjustments. Simply substitute all-purpose flour with gluten-free all-purpose flour blend that contains xanthan gum to help mimic the texture of regular flour. Ensure that all other ingredients are gluten-free; most brands are safe but always double-check labels if you’re sensitive to gluten. The baking process remains the same, so follow the original recipe while keeping these changes in mind for delicious results everyone can enjoy!
Here’s another recipe you’ll love!
Conclusion for valentine’s day Red Velvet Brownies:
In summary, making valentine’s day red velvet brownies is not only simple but also incredibly rewarding. With straightforward ingredients like butter, sugar, eggs, flour, cocoa powder, and vibrant red food coloring, you can create these delightful treats that are perfect for celebrating love and affection on this special occasion. Baking time typically ranges from 25-30 minutes depending on your oven settings and brownie thickness; always check doneness with a toothpick test.
These versatile desserts can be prepared ahead of time and customized with various toppings or mix-ins to suit your taste preferences or dietary needs. Whether served warm with ice cream or garnished creatively with fruits and frosting, these brownies will impress anyone who tries them. Embrace this opportunity to share something sweet this Valentine’s Day by whipping up these delectable treats that are sure to delight both friends and loved ones alike!
Print
Irresistible Valentine’s Day Red Velvet Brownies Recipe
- Total Time: 45 minutes
- Yield: 16 servings 1x
Description
Valentine’s Day Red Velvet Brownies are the perfect way to show your love and affection this season. With their stunning red hue, rich fudgy texture, and luscious cream cheese frosting, these brownies are irresistible. Easy to make, they combine the classic flavors of red velvet cake and chocolate brownies into a delightful treat that will impress anyone you share them with. Serve them warm with a scoop of vanilla ice cream or drizzle with melted white chocolate for an extra special touch.
Ingredients
1 cup all-purpose flour
1/3 cup unsweetened cocoa powder
1 cup granulated sugar
2 large eggs (room temperature)
1/2 cup vegetable oil
1/4 cup buttermilk
2 tablespoons red food coloring
1 teaspoon vanilla extract
Cream cheese frosting for topping
Instructions
Preheat your oven to 350°F (175°C) and line an 8×8-inch baking pan with parchment paper.
In a bowl, whisk together flour, cocoa powder, and salt. Set aside.
In another bowl, mix sugar and oil until blended. Add eggs, buttermilk, red food coloring, and vanilla; mix until smooth.
Gradually fold in the dry ingredients until just combined.
Pour batter into the prepared pan and bake for 25–30 minutes or until a toothpick comes out with moist crumbs.
Allow to cool before topping with cream cheese frosting.
Notes
For added texture, consider mixing in chocolate chips or nuts.
These brownies can be made ahead of time; store in an airtight container for up to five days.
- Prep Time: 15 minutes
- Cook Time: 30 minutes
Nutrition
- Calories: 200
- Sugar: 15g
- Fat: 9g
- Saturated Fat: 2g
- Carbohydrates: 28g
- Protein: 3g